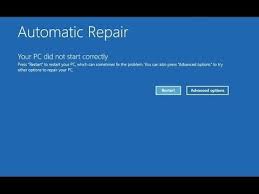
‘Startup repair’ is run when your computer fails to boot properly or when you have another startup issues. If the repair is successful, issues are fixed and your computer will boot fine. However, in some cases, if the repair is unsuccessful, you may see an error ‘Automatic repair couldn’t repair your PC’.
Note: If you read the entire error message, you will see a log file to find more details of the error. Please have a look into that file to see if you can identify what is causing the problem, so you can jump directly to the corresponding solution.
Now let us move on to the troubleshooting steps to resolve the error.
Solution 1: Rebuild BCD
- In the error message window, click on Advanced Options
- Then select Command Prompt (Admin)
- Enter your login credentials and in the command prompt, type the following commands and press Enter after each of them.
- exe /rebuildbcd
- exe /fixmbr
- exe /fixboot
‘Rebuildbcd’ is used to recreate the boot sector. ‘Fixmbr’ is used to correct any MBR corruption issues and ‘Fixboot’ is used when the boot sector is damaged. So, these commands help in repairing issues with the boot sector and help you solve the Automatic repair issue. If some of your data is missing due to MBR corruption, it can be recovered using data recovery tools and Yodot hard drive recovery is a great choice. Refer data recovery after MBR corruption for more details.
Solution 2: Run CHKDSK
Corruption in the file structure or bad sectors in the drive can also produce errors during startup. To resolve this problem, while in the command prompt, run CHKDSK to repair such corruption issues.
Please note that you will need to run CHKDSK on all the drives in the hard disk. An example of D drive is shown here.
Type ‘CHKDSK /r d:’ to repair corruption in D: drive and also check for bad sectors.
Once this is done restart your computer to check if the issue is resolved. If not, proceed to the next step.
Solution 3: Delete error causing files
Like said before, open the file indicated in the error message to see more details about the error. In some cases, the details in this file may point you to a file that is causing this issue. Deleting this particular ‘problem causing file’ can resolve the error. For instance, the file in question may be from a third party application or anti-virus etc. But before deleting the file, be 100% sure that the file you are deleting isn’t something important to your system, else you may cause harm.
Solution 4: Disable automatic repair
This is a good solution if you’re stuck in the Automatic repair loop. In order to disable automatic repair, follow the steps below.
- Restart your system and keep pressing F11
- Select Repair your computer > Troubleshoot > Advanced Options
- Then select Command Prompt, type the following command and hit Enter
‘bcdedit /set recovery-enabled NO’
Finally, restart your computer and see if it helps you resolve the error.
Solution 5: Restore registry
Corrupt Windows registry is also one of the reasons for the ‘Windows repair couldn’t repair your PC’ error. To resolve this error,
- Open Command Prompt using the steps in Solution 4
- Then type the following commands
- ‘copy c:\windows\system32\config\RegBack\*’
- ‘c:\windows\system32\config’
- Type ‘All’ if you are asked whether you want to overwrite files and hit Enter
- Then restart your computer and check if it resolves the issue
Solution 6: Reset your computer
If none of the above solutions help you resolve the error, Reset your PC to reinstall OS and start fresh.
- Restart your system and keep pressing F11
- Select Repair your computer > Troubleshoot > Advanced Options
- Select Reset This PC
Wait for the computer to finish reinstalling OS and then log in to your system. This may help you resolve the error.
Conclusion
We understand that this error can be frustrating and leave you helpless. So we’ve compiled this comprehensive list of solutions and hope that one of them will help you resolve the error. However, if you are still having trouble, it is best to recover from a non-booting hard drive as it may be risky to use this drive. Once data is recovered, you can examine further for other possibilities.