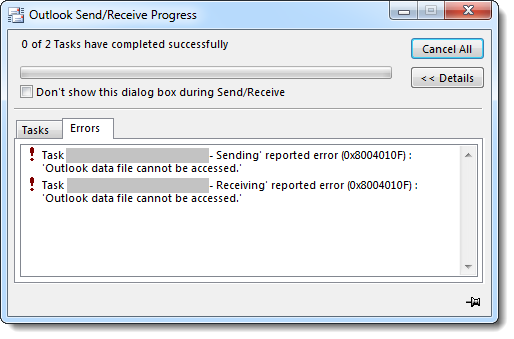
Outlook is a popular email service that many people use. However, sometimes there can be problems with it, just like any other app. One common issue is “Outlook Error 0x8004010F: Outlook Data File Cannot Be Accessed.” This happens when you try to send or receive emails using Outlook on a Windows computer.
In the rest of this article, we will explain why this error happens and how to fix it.
Table of content:
- What is Outlook Error 0x8004010F?
- What are the Possible Reasons for the Error 0x8004010F in Outlook?
- Methods to Fix the Error 0x8004010F in Outlook
- Restart Outlook and check for the internet connection.
- Check Outlook account settings.
- How to create a new Outlook account and set up an email using the “Auto Account” feature?
- Create A New Outlook Profile
- Repair Ost File using ScanPST.exe
- Repair Outlook data file cannot be accessed using Yodot Outlook PST Repair.
- Repair Using Outlook
- Conclusion.
- FAQs.
What is Outlook Error 0x8004010F?
Outlook error 0x8004010F occurs due to a corrupted Outlook profile while receiving or sending mail. Outlook Error 0x8004010f happens when Outlook can’t sync offline address book due to issues like profile settings, corrupted OAB files, or outdated Outlook versions.
Let’s look at the reasons and solutions for the Outlook error 0x8004010f in the later section of the article.
What are the Possible Reasons for Getting the Error 0x8004010F in Outlook?
Here are some possible reasons for the error 0x8004010F to occur in Outlook.
- File Corruption: Outlook data files can become corrupted due to various reasons, such as software issues, malware issues, and hardware issues. In such cases, Outlook may be unable to access the data file, and you must perform a corrupt OST file repair to solve the Outlook error message.
- Incorrect File Location: If the Outlook data file is deleted or moved from its original location, the Outlook data file cannot be opened, resulting in an error 0x8004010F message. This process can happen if the user accidentally deletes or moves the file to some other location.
- Network Connectivity Issues: If Outlook is not connected to the server due to some network issues, it can stop Outlook from accessing the data file, resulting in the error message 0x8004010F. Some other similar reasons for this error are slow internet connection or network outages.
- Outlook Profile Issues: If your Outlook profile is damaged or corrupted, it may stop Outlook from accessing your email data and cause an error message 0x8004010F. This can happen if you accidentally mess up your profile settings or due to software problems.
- Outlook Version Incompatibility: Changing your Outlook version might cause a problem with the file that holds your information. This can happen if you switch to a newer version of Outlook that doesn’t work with the file format or if you switch to an older version of Outlook that can’t read the file. If this happens, you might see an “error 0x8004010F Outlook data file cannot be accessed” message.
There are different ways to fix an Outlook error 0x8004010f depending on what’s causing it. Here are some methods mentioned below.
How to Fix the Error 0x8004010F in Outlook?

There are different solutions to fix the Outlook Data File that Cannot Be Accessed, depending on what’s causing it. Here are some tried and tested solutions for fixing Outlook Error 0x8004010F.
Method 1: Restart Outlook and Check for The Internet Connection to Fix the Error 0x8004010F In Outlook
If you are facing the Outlook error 0x8004010F, restart your Outlook and then check back again and also check the Internet connection. Restarting your system may sometimes resolve issues with the application and system.
Method 2: Check Outlook Account Settings.
To fix the Outlook error 0x8004010F, first, you need to check your Outlook account settings are correct and verify that the Exchange server is online. If you can log in successfully via Outlook Web App (OWA), then it could be a temporary connection issue. However, if the error persists, you should check with your administrator to verify if there’s any issue with the server settings. If you’re still experiencing the error after checking these things, you can try the following method to resolve the issue.
Method 3: Create A New Outlook Account And set up An Email Using The “Auto Account” feature
The reason behind the error 0x8004010F can be a due corrupted outlook file. However, creating a new Outlook profile can quickly solve this error. For this, find your Outlook data File’s exact location, and create a new profile.
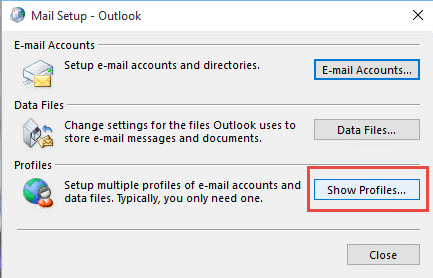
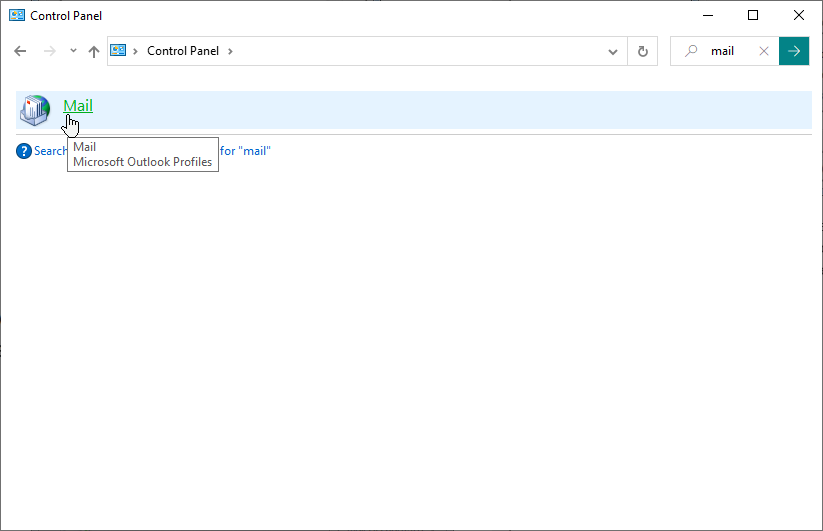
Step 1: First, open the control panel, search for mail, and click on mail (Microsoft Outlook).
Step 2: After clicking on Outlook, the mail setup opens; click on Show Profile.
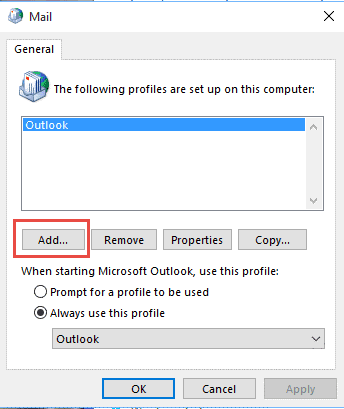
Step 3: Next, click on ADD button to create a new Outlook profile.
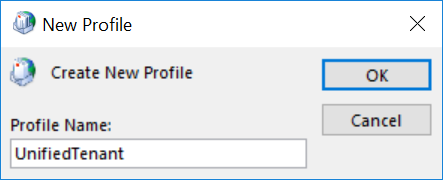
Step 4: Enter a Profile Name and click on OK.
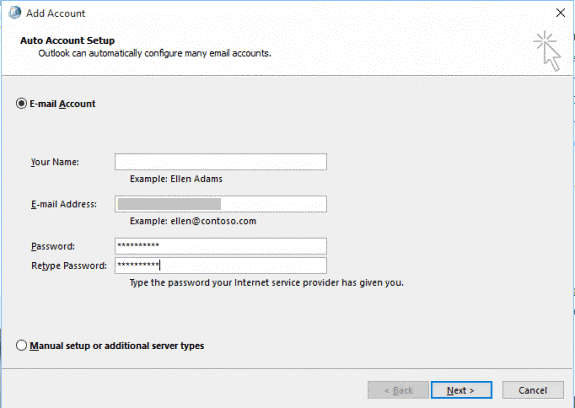
Step 5: In the Add Account Setup window, fill the required details, such as email, name, and password, and then click on NEXT.
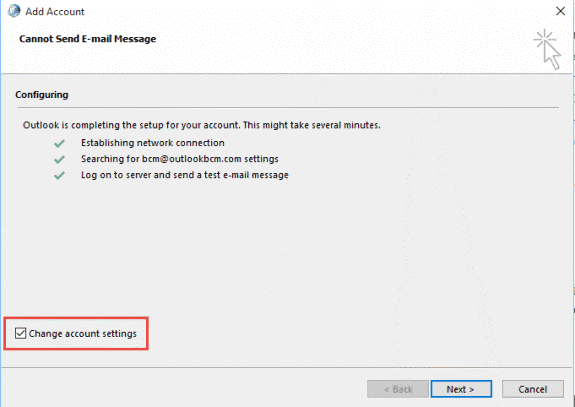
Step 6: To proceed, check the Change account settings checkbox and click Next.
Step 7: Select an old profile, and click Remove.
Step 8: Afterward, choose the Always to use this profile radio button, select the new profile name from the dropdown, and click ‘OK.’
To create a new profile in Outlook, restart Outlook for the changes to take effect.
Method 4: Create A New Outlook Profile
Outlook’s auto account setup creates an IMAP account, but you may need to create a POP3 account manually and connect it to your existing Outlook data file. Follow these steps to create a POP3 account and connect it to your Outlook data file.
Step 1: To open the Mail settings in Control Panel, search for mail and click on the Mail option.
Step 2: Then click Show Profiles and then select the Add button.
Step 3: Enter the profile name and click on OK.
Step 4: Afterward, select the Manually Configure server settings or additional server types and click ‘Next.’
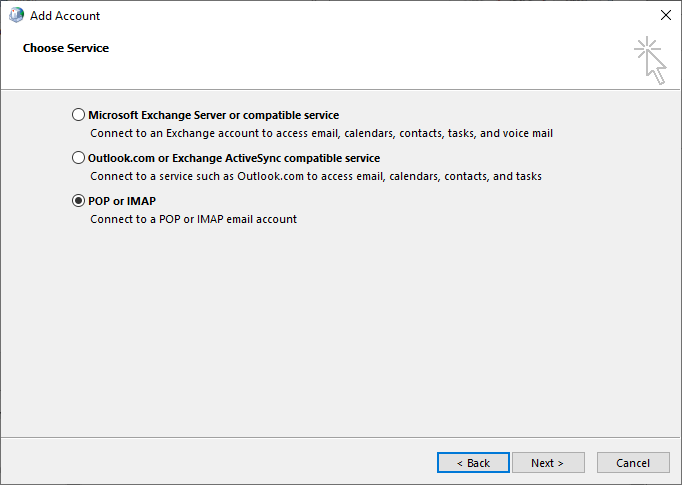
Step 5: Choose POP, IMAP, and click ‘Next.’
Step 6: Provide your account details and click ‘Test Account Settings‘ to verify your account.
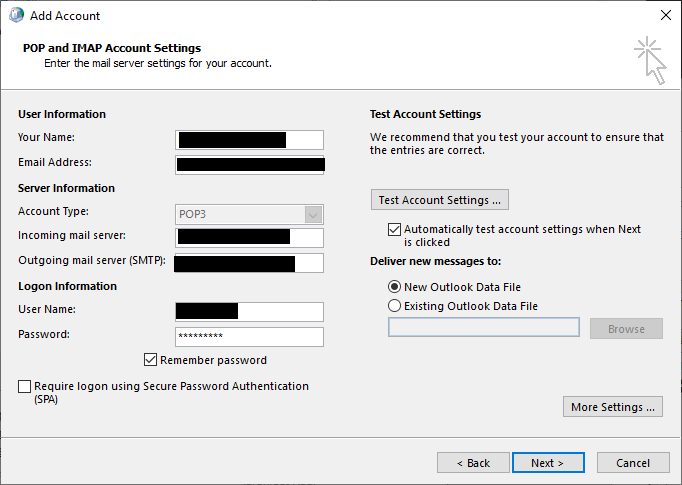
Step 7: Choose the Existing Outlook Data File option and click Browse to select the existing PST file.

Step 8: Click Next and then click Close and ‘Finish.’
Method 5: Repair Using SCANPST.EXE
Another option is to repair the OST file using the Inbox Repair tool called SCANPST.EXE, which is located in the Outlook installation directory. To repair the OST file with SCANPST.EXE, follow these steps:
Step 1: Navigate to the following location to find and launch SCANPST.EXE:
C:\Program Files\Microsoft Office\root\OfficeXX
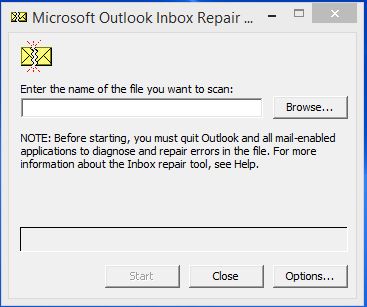
Step 2: Now, click on Browse and select the OST file. The OST file location is
C:\Users\user\AppData\Local\Microsoft\Outlook
Step 3: Click the Start button to scan your .ost file. If the tool finds any errors, click Repair to fix the issues with the OST file.
Note: Close Outlook and all Outlook-related applications before you start scanning and repairing your .ost file.
Step 4: After repairing the OST file, restart Outlook and click Send/Receive to verify that the error is resolved and Outlook works properly.
Note: If none of the above DIY methods works, you can repair the OST and PST files using professional tools like Yodot Outlook PST Repair software.
Method 6: Repair Outlook OST File Using Yodot

Step 1: Download and install Yodot PST repair software.
Step 2: After installing the Yodot PST repair software, launch the tool and choose from the following options.
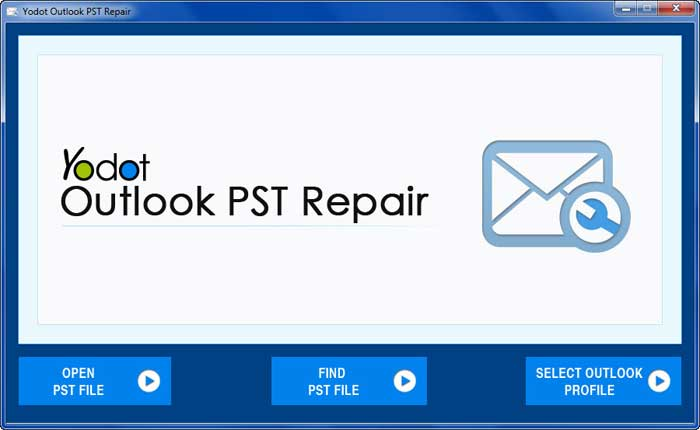
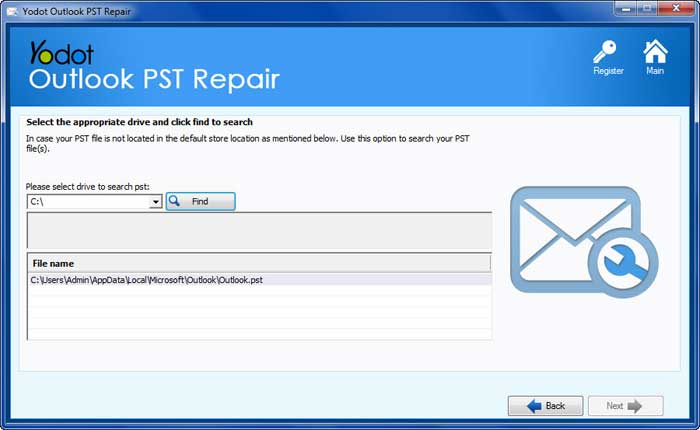
Note: Open PST File – Use this option if you know the location of your Outlook PST file.
- Select the “Find PST File” option in the Yodot PST repair software to find the PST file location in a specific drive.
- Choose Outlook Profile – If you want to select any particular Outlook profile to repair a corrupt PST file.
Step 3: ‘Browse’ and select the ‘location’ to store your Outlook PST file after the repair process.
Step 4: Choose between a ‘Normal Scan’ and a ‘Deep Scan’ for the required scanning process and click on Repair.
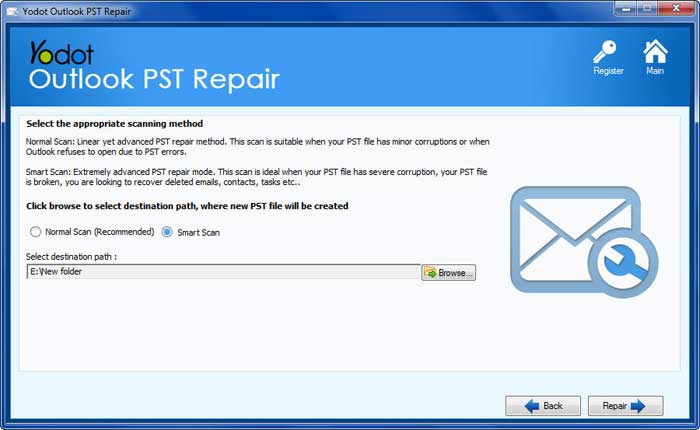
The Yodot Outlook PST repair software scans and fixes the selected PST file, restoring it as a new healthy PST file. Once complete, the tool displays the repaired Outlook PST file elements, such as emails, contacts, notes, tasks, and journals.
Method 7: Repair Using Outlook
You can try repairing the installation files or reinstalling the application to fix Outlook issues. Here are the steps to repair Outlook:
Step 1: Open the Control Panel and select the ‘Programs’ option. Then, click on ‘Programs and Features.’
Step 2: Search and click on Microsoft Office.
Step 3: Click on Change.
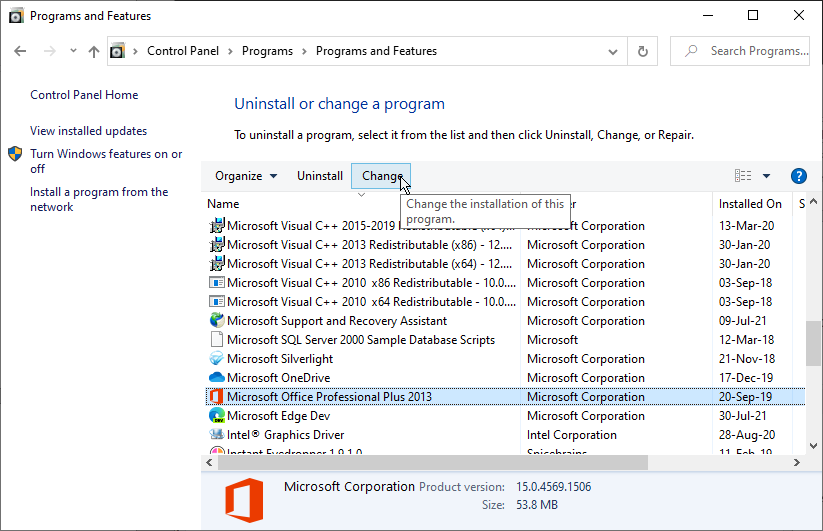
Step 4: Then click Repair and Continue and follow the repair wizard. After the repair, open Outlook and check if the error is resolved.
Conclusion:
If you can’t access your Outlook data file, creating a new profile may help. However, if that doesn’t work, there may be a problem with the file that you can fix using a tool like SCANPST.EXE or specialized professional software like Yodot Outlook pst repair. These tools can repair the file so that you can reaccess your data. Then, import the repaired file into Outlook or export it to other locations.
FAQS:
- How to Repair Outlook Data Files?
To repair Outlook data files, use SCANPST.EXE or Yodot Outlook PST Repair. Close Outlook and run SCANPST.EXE to scan and repair the data file, or use third-party software for advanced repair features. Once the repair is complete, restart Outlook to check if the issue is resolved.
- How can I prevent the “Outlook Data File Cannot Be Accessed” Error from Occurring?
You can prevent the error by regularly backing up your Outlook data, keeping your Outlook version updated, and avoiding any actions that may damage the data file, such as force-closing Outlook or unexpectedly shutting down your computer.