Don’t want to lose your important Outlook emails at any instance? Then, immediately save Outlook PST or OST emails to your local hard drive to preserve them forever.

Don’t bother about losing your important Outlook emails anymore. You can save (backup) all your Outlook emails onto the local hard drive of your computer or even onto an external hard drive to use it whenever you need.
This is the cloud era. Of course, the cloud is the best means for data management. However, every so often it is good to have a local backup of your vital emails. It never depends, for what purpose you are using Outlook. But, saving your Outlook emails on a hard drive is really a good idea. This serves best in security point of view – also the process is relatively simple to carry-out.
So, if you are looking for an efficient way to save your Outlook emails to a local hard disk then, you are at right place. In this informative article, you will find three different ways (both for Mac and Windows platform) to save Outlook emails on the hard drive with ease.
How to Save Outlook Emails on a Local Hard Drive?
A. Steps to Save Outlook Emails on a Local Drive -for Windows
There are two different techniques to save Outlook emails on a local hard drive if your computer is running with Windows operating system.
Method 1: Export Outlook Data File
This first method allows you to directly export (backup) Outlook emails from Outlook application. This way lets you to effortlessly export required emails onto your local hard drive. To do it,
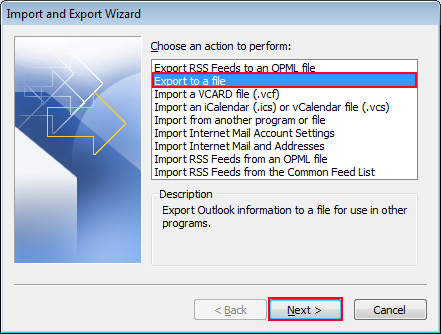
1. Open Microsoft Outlook application, go to File menu. Select Open & Export option and click on Import/Export button.

2. In the Import and Export window, choose Export to File option hit Next.
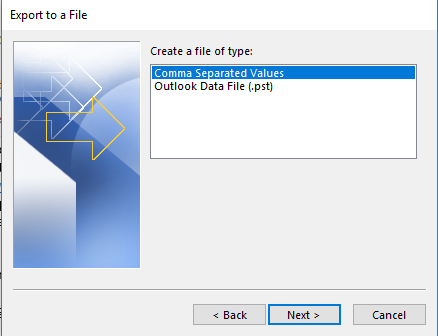
3. Select Outlook Data File (.pst) and go Next.
4. In order to save Outlook emails on your local hard drive, choose Inbox to export. If you want, expand the Inbox and select required email folders to export. Then, proceed.
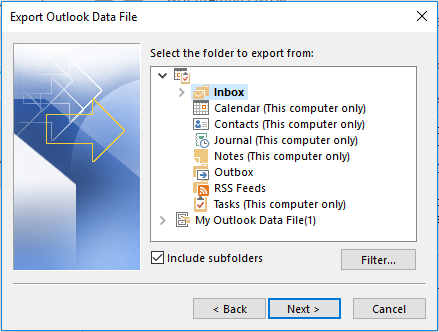
Note: If you wish to backup/save Outlook emails onto an external hard disk, then connect the portable drive to the computer. Ignore (Cancel) errors or messages if appear.
5. Browse a location on your local hard drive or an external hard disk. Give a name for the backup file and hit OK.
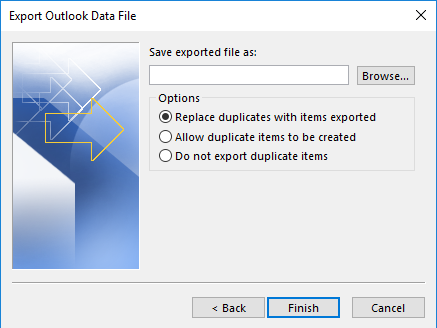
6. Finally, click Next and Finish the process.
If you want to secure your emails, password protect it by entering a password when prompted.
Note: In case, if you want to move Outlook to another drive on the same computer or to another new computer then also you can make use of this Export and Import option. This inbuilt migrate option available in Outlook helps in moving all Outlook attributes to a new computer or new profile; except account Settings.
If you are willing to transfer entire Outlook data along with your account settings, then try Yodot Move Outlook PST.
Method 2: Manually Copy Outlook Data File to Hard Drive
You can follow below steps to find the location of Outlook emails on your PC and manually copy them.
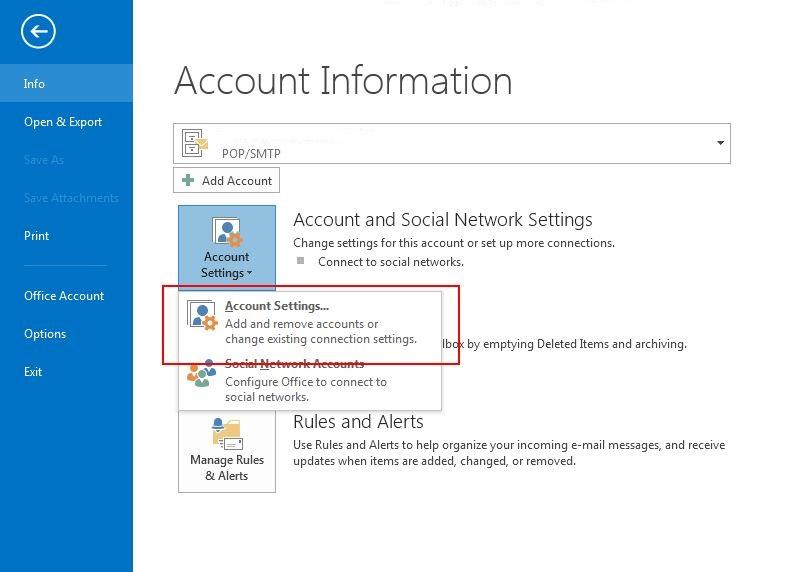
1. Launch Microsoft Outlook, go to File and select Account Settings.
2. Click on Data Files and note down the exact location of Outlook data file on your PC. Note PST file location if you are using POP3 or IMAP. Else, OST file’s, if you are using exchange server.
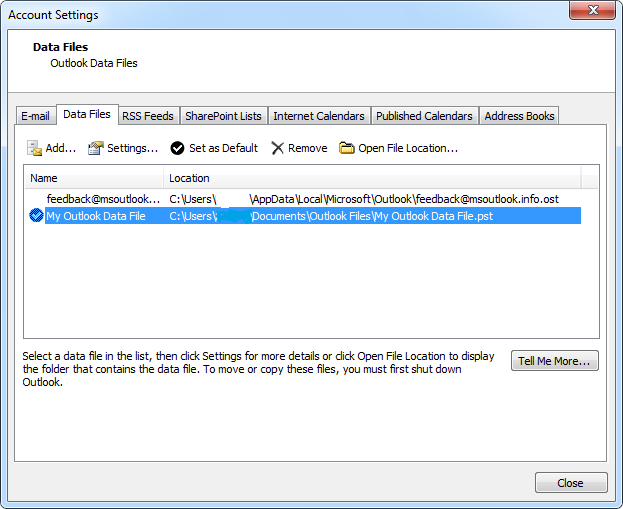
3. Follow the noted down path to find the data file on your PC.
Else, select your data file and directly click on Open File Location.
4. Once you reach the data file location, copy .pst or .ost file to your local drive or onto an external hard drive as a backup.
This method not just saves Outlook emails on your local hard drive but also other Outlook attributes like calendars, notes, tasks, and more.
B. Procedure to Save Outlook Emails Locally, If You Are Using Mac:
Before you start saving your Outlook emails on the Mac drive, make sure that your Mac machine has internet connectivity and your inbox is up to date.
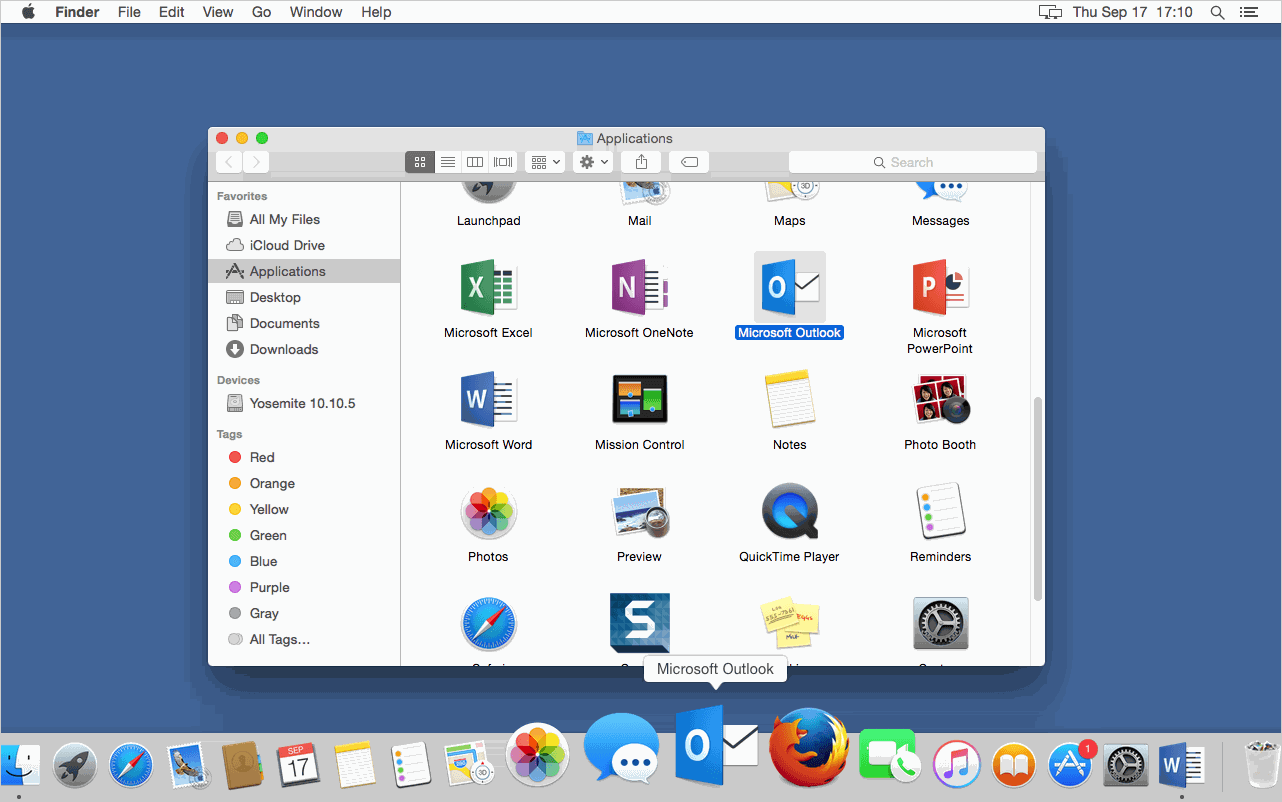
1. Now, launch Microsoft Outlook app on your Mac.
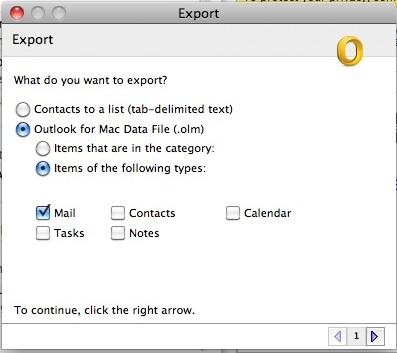
2. Go to the File menu, and select Export option from the list.

3. Next, you will be asked for the type of file to Export. Enable Outlook for Mac Data File (.olm) and select Mail (if you wish to choose Contacts, Calendars, Tasks and Notes too). If you want to backup only emails, then uncheck the rest.
4. After choosing emails for backup, click on Export button.
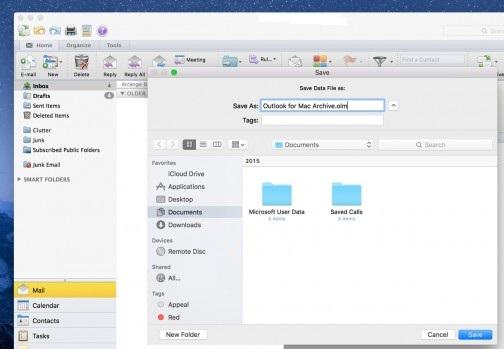
5. When you are prompted to save emails (.olm backup), mention a safe location on your hard drive.
If your emails are sensitive then it is suggested to save them on an external hard drive (too).
That’s it! Now, you have a safe backup of your emails. Also, it is recommended to save emails and other items regularly, as it helps when your Outlook account go down or face issues.