You have been through many problems while working on your Mac, like files getting deleted accidentally, formatting a partition by mistake, losing files while transferring them to another storage drive, and so on. But you are stuck with a new problem now! Some of the folders and files on Mac have grayed out, and you are not able to access them. You don’t know how to fix the issue.
Usually, files and folders are displayed in the Mac Finder app in the regular black font. But when the folders and files are grayed out in Mac finder, then you cannot move/delete those files and folders. They cannot be accessed either.
A lot of people come up with questions saying: Why are my downloaded files grayed out? Why does this happen? You will find answers to all your grayed out files issues in this article.
Why are all my Files and Folders Grayed Out on Mac?
Grayed-out folders and files occur when copying files/folders from one location to another, especially when copying them from network drives or to network drives. Grayed-out files and folders will be dated ’24 January 1984′. This indicates that the files and folders have been grayed out. So the next question is how to fix grayed-out folders and files on Mac.
How to Fix and Recover Data From Grayed Out Folders and Files?
First, restart your computer if you haven’t already done it since you noticed this problem. Sometimes that might be all you need to do. If the problem still persists, follow the below-mentioned methods:
Method 1: Fix the grayed Files Issue Using the Terminal App
Method 2: Fix using the Note App
Method 3: Fix the issue by making Alias
Method 4: Open the folder directly from the Terminal App
Method 5: Recover Data from grayed-Out Folder Using Yodot
Method 1: How to Fix the grayed Folders/Files Issue Using the Terminal App?
Changing the file’s date is the fastest way to fix the issue, but Mac users must use Xcode from the App Store to change it. Just follow the steps below to easily fix grayed-out files and folders on Mac –
Step 1: Open Mac Finder, and go to the grayed-out folder/file. If the file or folder is dated as 24 Jan 1984 i.e. ’24 January 1984 error’. If yes, then go to the next step.
Step 2: Go to Applications and open the Terminal app
Step 3: Now type “SetFile -d 15/03/2022 /path/to/your/grayed/out/folder_or_file” and tap on Return
The date of the folder or the file will now be changed to 15/03/2022 (or the date you have chosen). That is it. Your folder or file is not gray anymore. It turns black.
Method 2: How to Fix Grayed Files Issue Using Note App?
Step 1: Go to Application and open the Note App and select Create a Note.
Step 2: Go to Finder and look for the grayed-out file. Then, drag the files to the blank space of the new note you created.

Step 3: Please wait for a few seconds and double-click on the files. You will then see that your files have returned to normal, and all you have to do is copy the files from the folder into a new one.
Method 3: Fix the issue by making Alias
Step 1: Right-click on the grayed files or folders.
Step 2: Click on Make Alias and click on the Alias Folder.
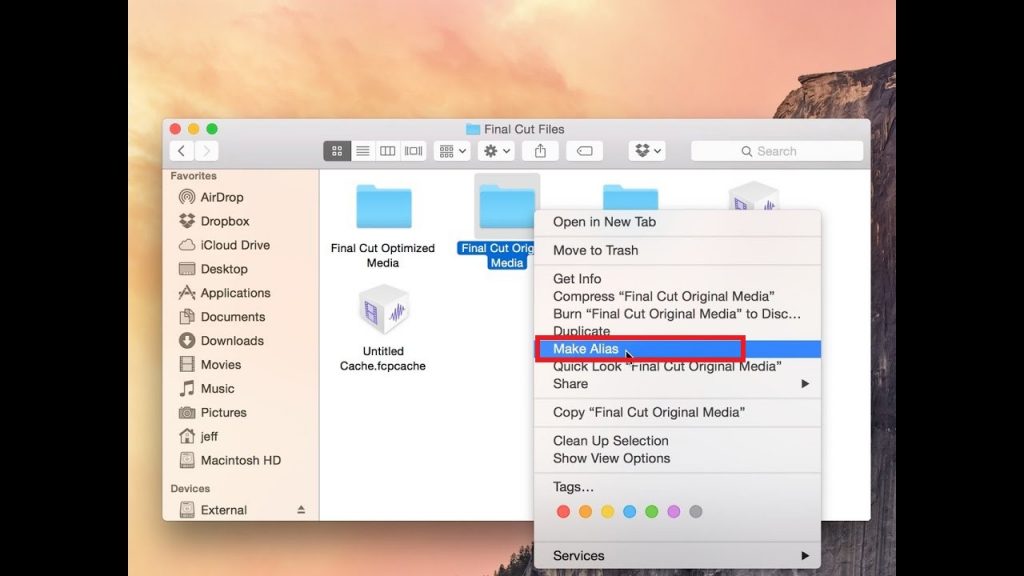
Step 3: Copy the files from the folder to a new file location.
Method 4: How to Open the grayed-Out folder Directly from the Terminal App?
If none of the above solutions worked, you could try to open the files directly via the Terminal app if the folders or files are grayed out on your Mac.
Step 1: Open the Spotlight dialog box by Command + Space, type Terminal in the box, then click Return.
Step 2: Type in Open in the Terminal window and click on Space; continue to drag the grayed out files or folder directly into the Terminal Window.
Step 3: Check to see if the folder address has been populated with the full patch.
Step 4: Lastly, click on Return, and the grayed-out files will pop out. Please transfer the files to another new file location.
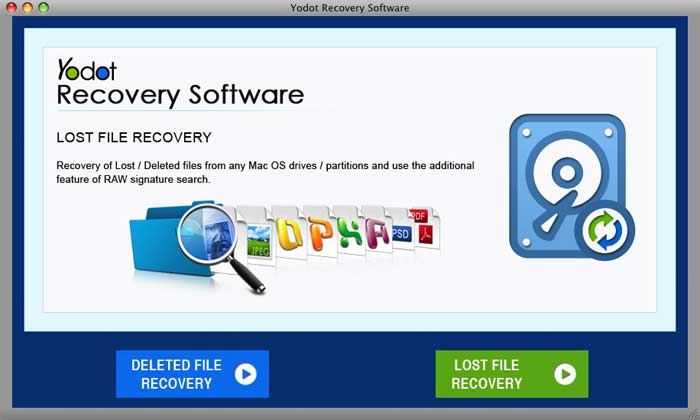
Alright, so you have fixed the issue. Here is another method that we bring to you to recover inaccessible files and folders on your Mac. Yodot Mac File Recovery is an efficient tool to recover files and folders which have become inaccessible, deleted, or lost. This Mac File Recovery tool helps to restore files from Trash on MacBook Pro, MacBook Air, iMac, and other Mac desktops and laptops.
Method 5: Recover Data from grayed-Out Folder Using Yodot
Yodot Mac File Recovery software scans the entire drive of the storage medium to find and recover deleted or missing files from it. Be it your important documents, Spreadsheets, archived files, and so on, this tool retrieves them all on Mac in an easy and safe manner. It will get back your files and folders in just a few steps.

Download and install the Yodot Mac File Recovery application on your Mac and follow the below-mentioned steps.
Step 1: Launch the application and select the option, whether to recover ‘Deleted files’ or to recover the ‘Lost files’.
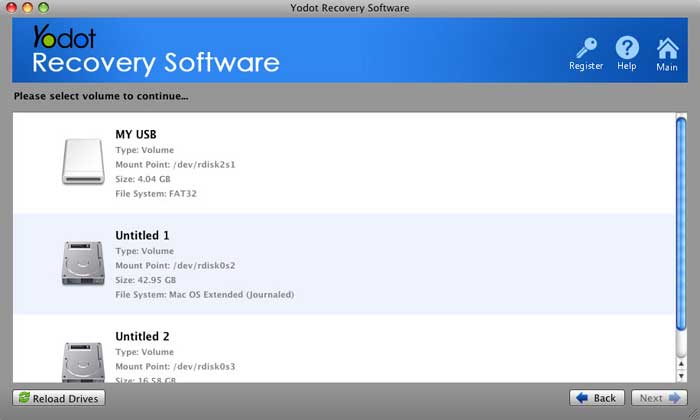
Step 2: Select the drive/volume from where files are to be recovered and let the software complete a deep scan the drive/volume.
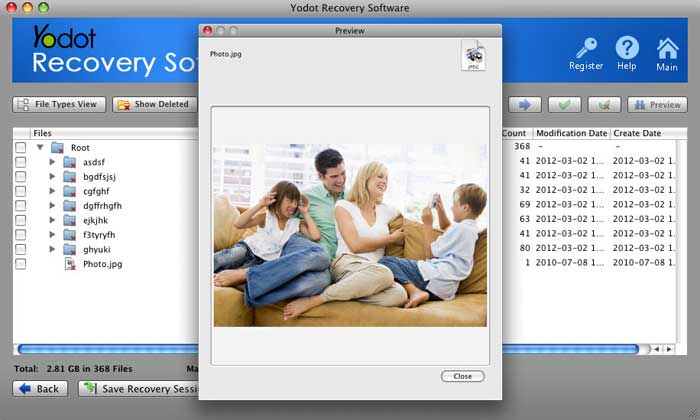
Step 3: Once the scanning procedure is complete, Preview the recovered file to ensure that the right file has been retrieved.
Step 4: Choose the destination location, to Save recovered files.
Note: Make sure not to select the source drive otherwise, data will be deleted/lost permanently.
Hope this article helped you in fixing grayed out files and folders on Mac with the use of different methods. For quicker and safe recovery of data from grayed out files and folders, I would recommend you to use recovery software like Yodot File Recovery.