***Convert OST File to PST Without Using Any Software***
With the evolution of the digital era, email has become the most significant part of communication. Also, it is one of the cost-effective and comprehensive means of digital communication.
Nowadays, any admirable and potent messaging client software with the ability to store personal information is ideal for business organizations. There comes Microsoft Outlook. It is one of the well-known email client applications normally used in organizations.
In Outlook, all your mailbox data like emails, contacts, calendars, tasks, notes, etc. are saved into a data file. Typically, there are two types of Outlook data files.
- PST stands for Personal Storage Table
- OST stands for Offline Storage Table
Personal Storage Table (PST)
A personal Storage Table is a kind of personal folder file. A Personal Folders File i.e. .pst is primarily an Outlook data file, that contains your emails along with other Outlook attributes. PST files are stored on your computer.
Offline Storage Table (OST)
Whereas, Offline Storage Table (OST file) basically is the emails, contacts, calendars, and other Outlook items which are saved on your Exchange server. OST file helps you to work in offline mode, with its presence in your Exchange server. And as soon as the internet connection establishes between your system and server, the data synchronizes.
At times, you need to convert the OST file to PST format. There can be many reasons for you to convert OST files into PST. And, among those few are listed here.
Reasons for OST to PST Conversion:
- Exchange Server crash
- When Exchange Server is under maintenance
- Switching organization
- Moving Outlook from one system to another
- OST corruption
- OST file size limitation
- Synchronization issues
- Exchange Server downtime etc.
So, converting the OST file to PST format is necessary to access your Outlook, if you are encountering the above are alike situations.
OST to PST Conversion:
There are two ways you can try, to convert your OST file into PST.
- Manual methods to convert OST files to PST
- OST to PST converter software
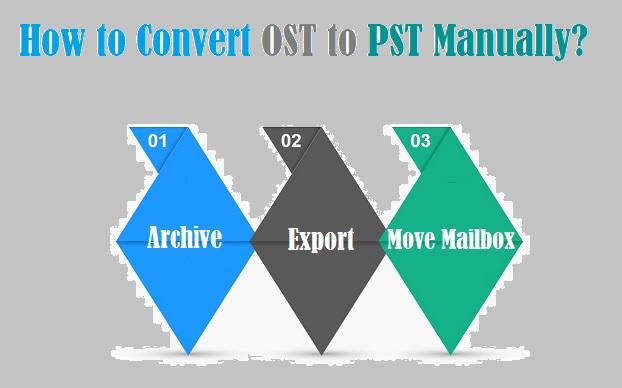
How to Convert OST File to PST File Manually?
Step 1: Archive
Run the Microsoft Outlook application on your system.
Open the OST file which you want to convert into a PST file.
On the File menu, select the Info option.
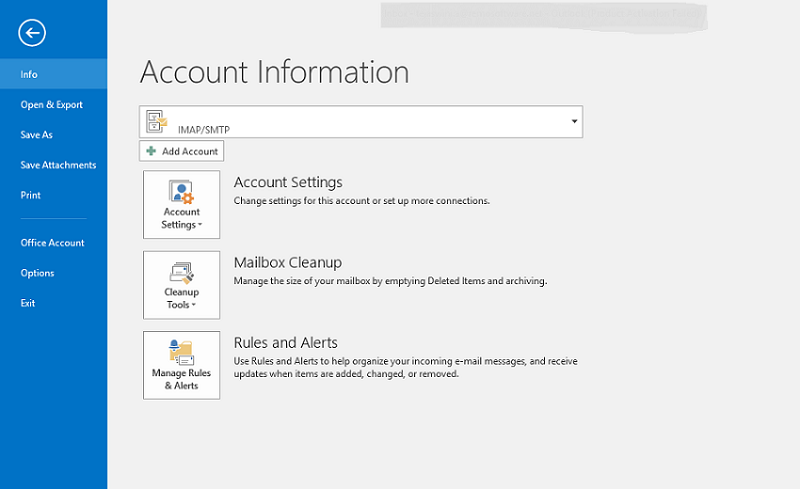
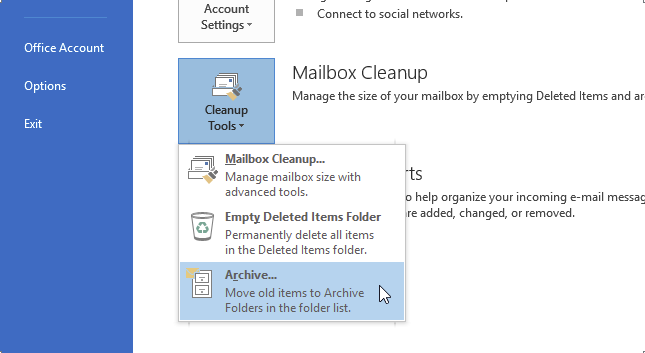
Choose Cleanup Tools from the displayed list.
Click on Archive… option from the drop-down menu.
Enable Archive this folder and all subfolders option (by default Outlook enables it; if not you manually enable it). Now, select folders from the shown list which you want to move.
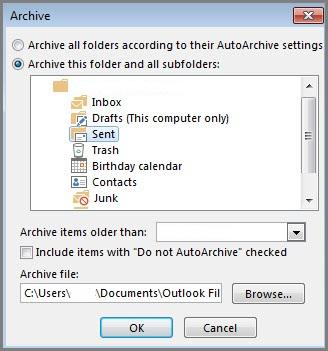
You can also use Archive items older than the option to archive items from a specified date. If you wish, go for it and mention a date from the calendar.
Click on the Browse button and specify a location to save the PST file. Also, name this new PST file and hit the OK button. In the edit window, you can see details of the PST file.

Click on OK to start the conversion process.
Step 2: Export
The Export feature in Outlook not just helps you to convert OST files to PST, but also in CSV and Excel formats. Create a new blank PST file before starting the export action.
Open the Microsoft Outlook application and go to the File tab.
Select Open, then Import option (in later versions of Outlook you can directly choose Open & Export).

In Import and Export window, select the Export to a file option.
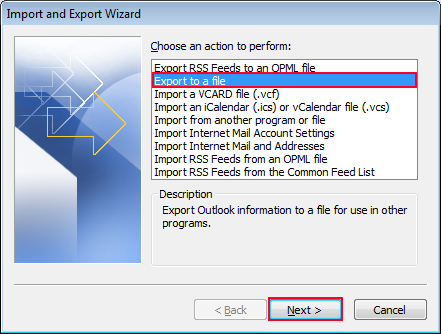
Click on the Next button to continue the process.
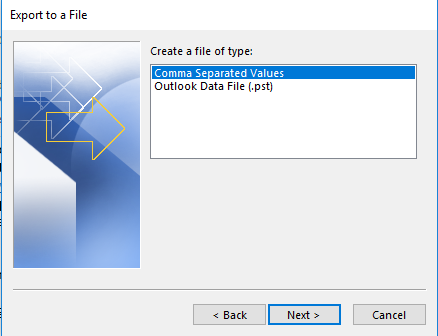
Now, select Outlook Data File (.pst) from shown options.
Next, in the Export Outlook Data File window, expand the OST file. Select the mailbox folder you wish to export in the new PST file.
Click on the Browse button and select the formerly created PST file.
Hit OK, then you can see the selected PST file (with its location) in the edit box. You can also make use of other options available there.
Finally, click on the Finish button to start the Export process.
Step 3: Move Mailbox Items to New PST File
This is one of the easiest ways to move your mailbox data from the OST file to PST.
To do this,
- First, create a new PST file in your Outlook profile
- Drag all your mailbox folders from the OST file onto your newly created PST file
Note: You can’t drag the default folders like Inbox, Calendar, Contacts, etc. from your OST file into a PST. Instead, copy those default folders from the OST file to PST.
However, manually converting OST files to PST seems an easy way to do. But, sometimes the file gets corrupted during the conversion process. So, it is not an effective technique to convert your OST file into PST.
Thus, you need to try efficient programs like Yodot OST to PST Converter in order to convert OST to Outlook data files without encountering any further issues or complexities. This is precise software to convert your inaccessible, damaged, corrupt, or broken Microsoft Exchange OST files to readable Outlook PST file with less time and effort.
All you need to do is, just install the Yodot OST to PST Converter tool. Run it and select the OST file which you want to convert into PST format. Specify the desired location to save the PST file and click on the Convert button. That’s it! Your PST file will be created in your chosen location.
Along with a simple and self-driven interface, the tool offers splendid technical support to help whenever you need it. So, try it now.