Microsoft has finally retired its support for the XPS file format and removed the XPS Viewer app on new installations. Since Windows 10 April 2018 Update (version 1803) the XPS Viewer app is no longer available on Windows. In simple words, Windows 10 and 11 do not support XPS file viewer.
People come to me asking: How do I open an XPS file in Windows? What programs can open XPS files?
Most people probably don’t even know what XPS files are all about and why they’re used. So let’s start from the basics.
Table of Content:
- What is an XPS File?
- What is an XPS Viewer?
- How do I Open an XPS File in Windows 10/11?
- How Do I Convert An Xps File To Pdf?
- How to Use Google Drive to Convert XPS File to PDF on Mac?
What is an XPS File?
XPS( XML Paper Specification ) is a file format introduced by Microsoft as a competitor for Adobe’s PDF files. XPS file format was introduced with Windows Vista and despite not being very popular, it continued to ship with Windows 7 and Windows 8.1.
A .xps file contains information about a document’s structure and content, including its layout and appearance. An XPS file can contain one or more pages.
What is an XPS Viewer?
The Windows XPS Viewer is a tool that lets you view and edit XPS file formats. This software can be used in a variety of formats and can be easily created on any Windows-based computer program.
How do I Open an XPS File in Windows 10/11?
However, if you still deal with XPS files or have one saved in XPS format, Windows 10/11 still comes with a default XPS viewer. So, in this article, we will show you how to view XPS files and documents on a Windows 10/11 computer. Let’s check out.
Method 1: Enable XPS Viewer on Windows 10
Method 2: Install XPS Viewer Using RUN Command
Method 3: Try Installing XPS Files Reader
Method 4: Open XPS Files Using Google Drive
Method 5: Convert XPS Files to PDF Format
Method 1: Enable XPS Viewer on Windows 10
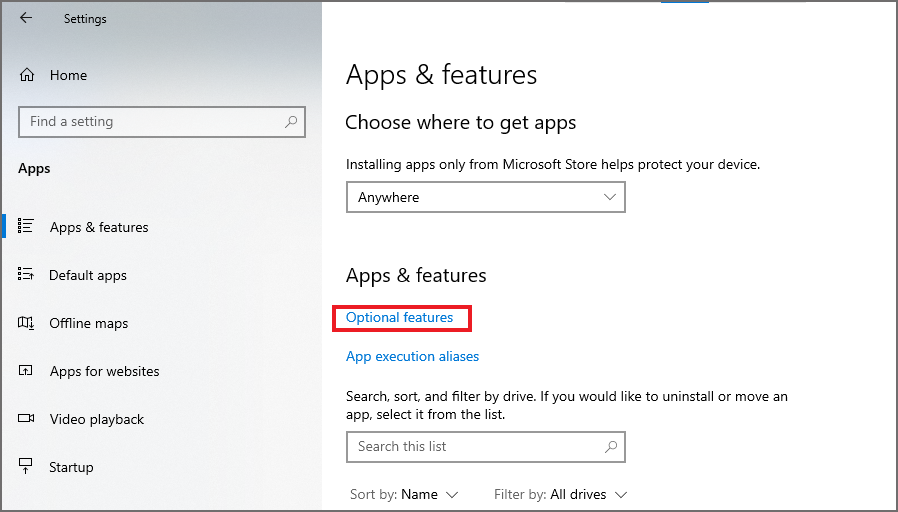
- Open the Settings app.
- Go to Apps, and click the Optional features link.
- Choose to Add a feature.
- Select XPS Viewer from the list.
- Click the Install button.
Method 2: Install XPS Viewer Using RUN Command
If you are unable to access Windows 10’s settings page, you can try implementing this method. In this method, we will be using the RUN Dialog box on Windows 10 to install the XPS viewer application.
Step 1: Click on the ‘Windows + R’ button to open the Run dialog box from the list.
Step 2: Type in ‘xpsrchvw’ and hit the Enter button.
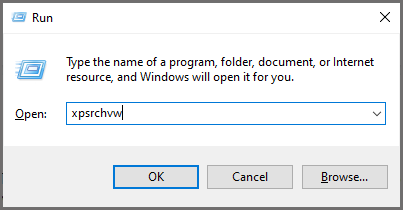
That’s it! Now you can directly open the XPS files using the above command. This command will activate the XPS viewer of your Windows 10/11 computer.
Method 3: Try Installing XPS Files Reader
You can install a third-party application to open an XPS file in Windows 10/11. Here is a list of applications that will open XPS files.
- Free XPS Viewer
- XPS Annotator
- Sumatra PDF
- MuPDF
- Danet Studio
Method 4: Open XPS Files Using Google Drive
If you are not willing to install a third-party app to view an XPS file, go with Google Drive. Just by uploading the XPS file to Google Drive, you can access the contents of the XPS file.
Step 1: Open Google Drive and sign in with your account.
Step 2: Click the New button and select File Upload.
Step 3: Select the XPS file and wait for it to upload.
Step 4: Double-click to open the file in Google Drive and it will open.
Method 5: Convert XPS Files to PDF Format
In case you are still not able to view the XPS file, you can convert XPS files to PDF. Next, let’s learn how to convert an XPS file to a PDF.
How Do I Convert An Xps File To Pdf?
You can print from the drop-down menu in the XPS view application by clicking on File.
Step 1: Click on Microsoft Print to PDF in the dialogue box to print.
Step 2: Print by clicking on the Print button.
Step 3: Your new PDF should be located where you want it.
If you are using a Mac and need to convert XPS to PDF, then follow the next method.
How to Use Google Drive to Convert XPS File to PDF on Mac?
Using Google Drive, you can easily convert XPS files to PDF files on Mac by using the following steps.
Step 1: Go to Google Drive.
Step 2: Upload the XPS or OXPS file to your Google Drive.
Step 3: Double-click the document, and now you can preview it.
Step 4: Click the Print icon in the top right corner, which will take you to a new tab. There is also a Print icon on the page opened in the new tab. Click the icon.
Step 5: Now you should find the Save as PDF option. Choose to save all or selected pages of your XPS or OXPS document to PDF format.
Step 6: Click Save.
Step 7: In the dialogue box that appears, click Save.
This method is a little bit complicated, but it does work.
Hope this article helped you in viewing the XPS file. If you are a regular user of XPS files you might face a situation like deletion of XPS or if you have already deleted or lost your XPS file due to any reason, and want to recover deleted XPS files. Don’t worry there are various software’s to restore XPS files but the most suggested software by industry experts to get back lost XPS documents is the Yodot Files Recovery tool.