Understanding CHKDSK command
CHKDSK or Check disk, as the name describes, is a command used to check the integrity of the disk on the computer. It verifies the logical errors and bad sectors in the storage device.
When you run the CHKDSK command, the tool marks the bad sectors to help Windows understand that no new data is to be stored on those sectors; the existing data will be lost permanently as it is marked, and Windows will not access data.
Hence it is advised to know the parameters you are using with the command and close all the programs, folders, and files before running CHKDSK to avoid data loss.
Can I recover CHKDSK deleted Files?
Yes, you can recover the lost files that were lost after running CHKDSK command; you need to act on it quickly and use effective tools to get them back.
Method 1: Recover lost files after CHKDSK
As I mentioned earlier, the effective recovery tool can do the job for you without any hiccups, Yodot Hard Drive Recovery is an easy and safe solution for this problem. You can recover the data from the hard drive even if the entire drive is corrupted or formatted.
Follow these steps to recover files deleted by CHKDSK using Yodot Hard Drive Recovery:
Step 1: Download and install the software on your computer.
Step 2: Launch the Software and click on Lost File Recovery.

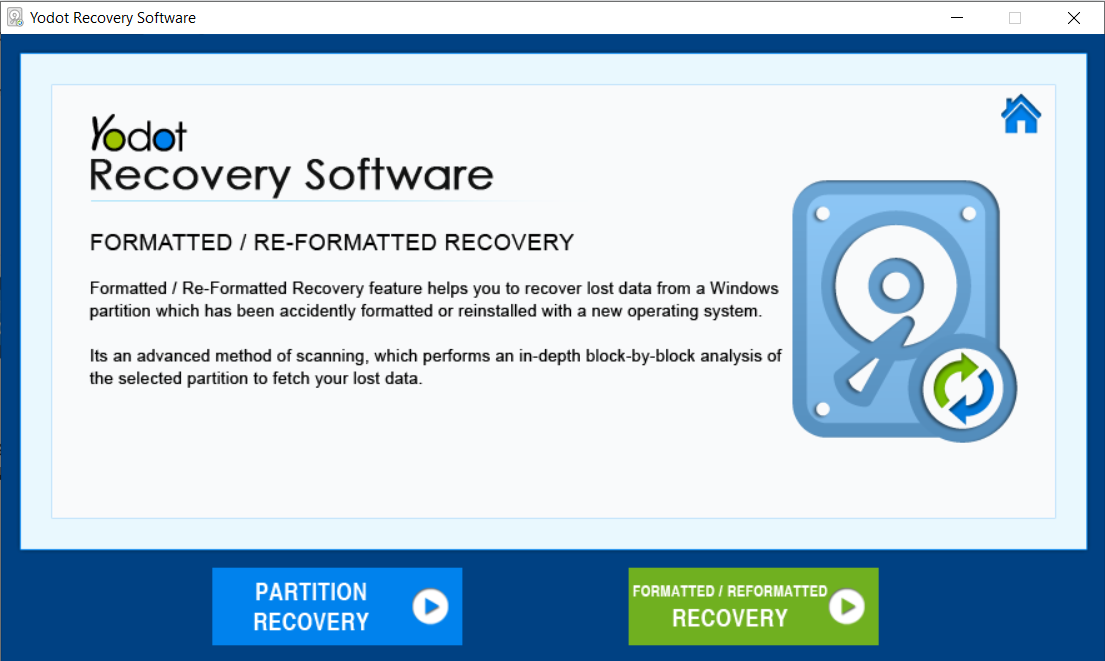
Step 3: Click on Formatted/ Reformatted Recovery.
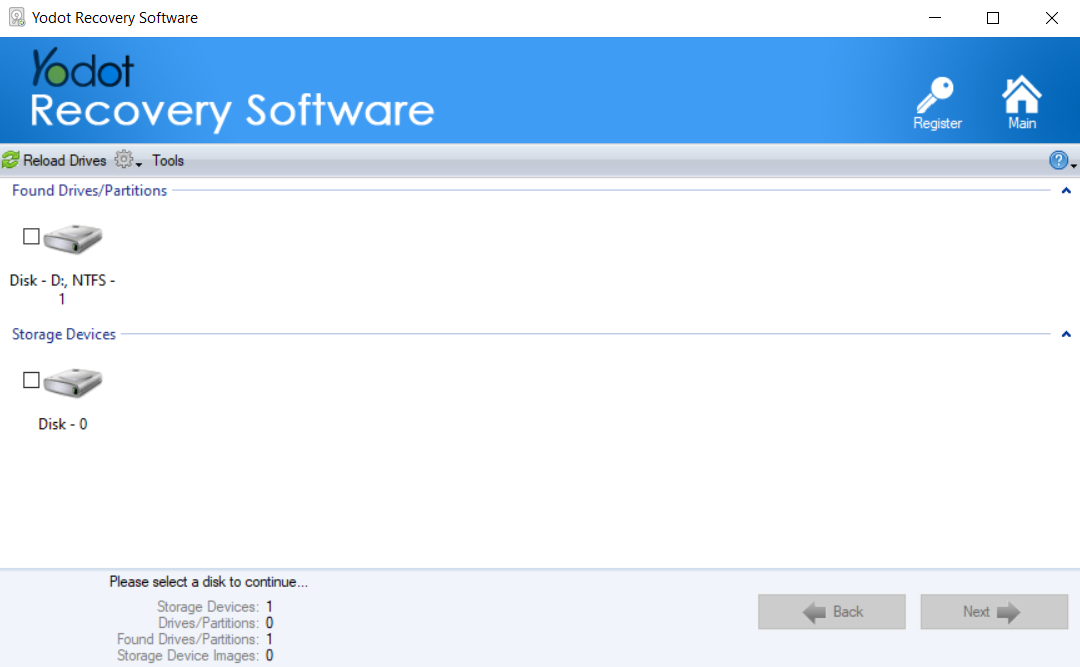
Step 4: Select the drive from which you lost the data after running the CHKDSK command and click on Next.
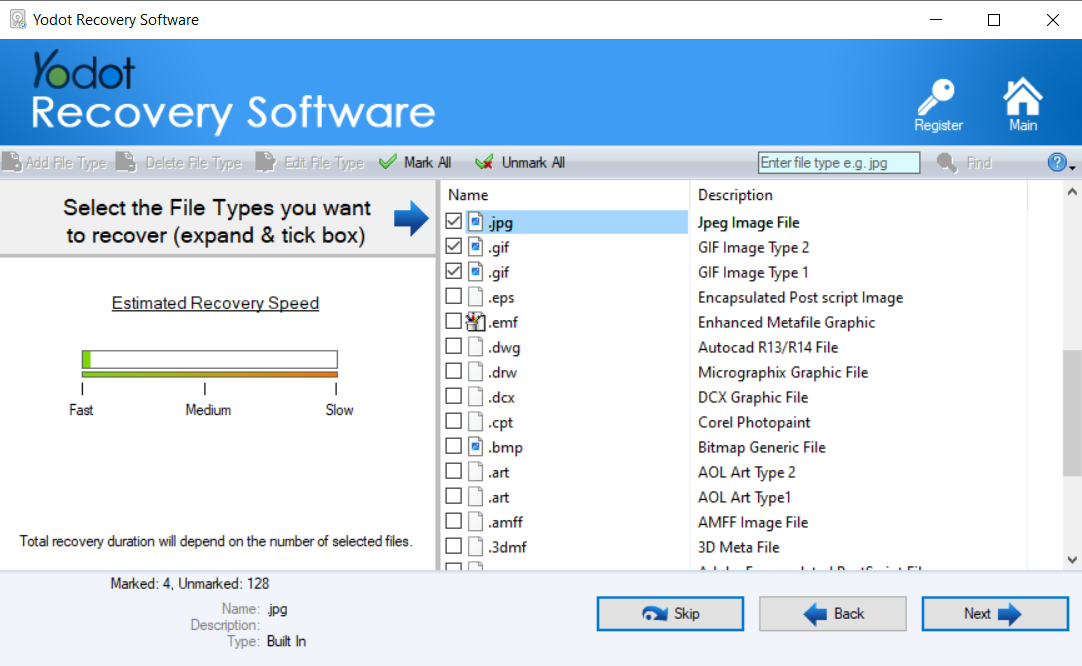
Step 5: You can choose specific file types to recover which can reduce the scan time significantly.
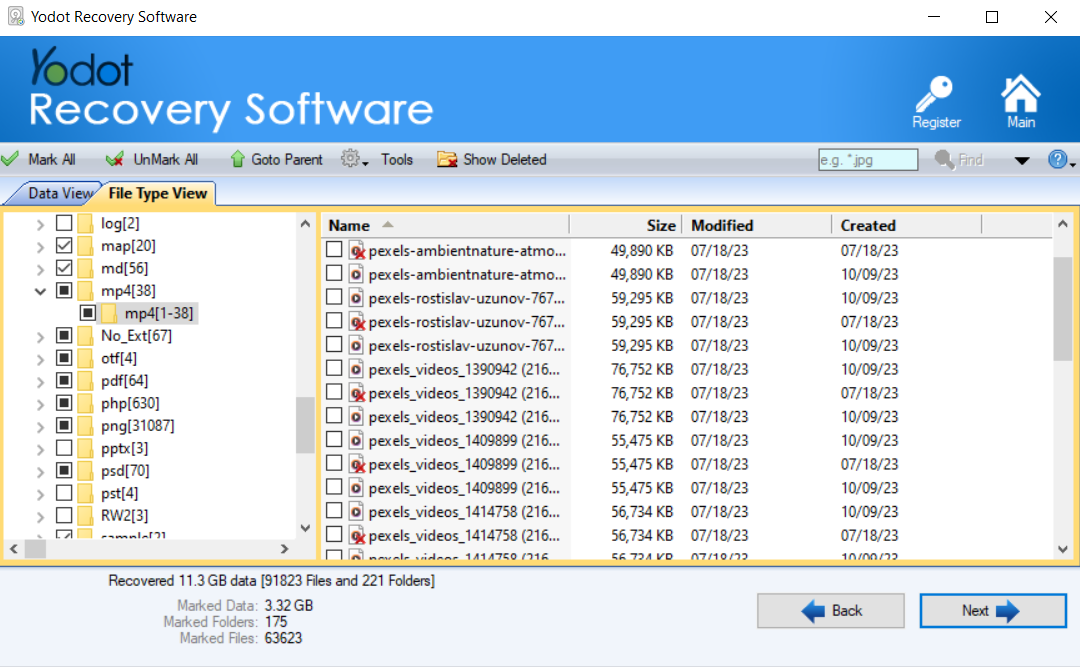
Step 6: Once the scan is completed, view the recovered data in both file type view and Data type view.
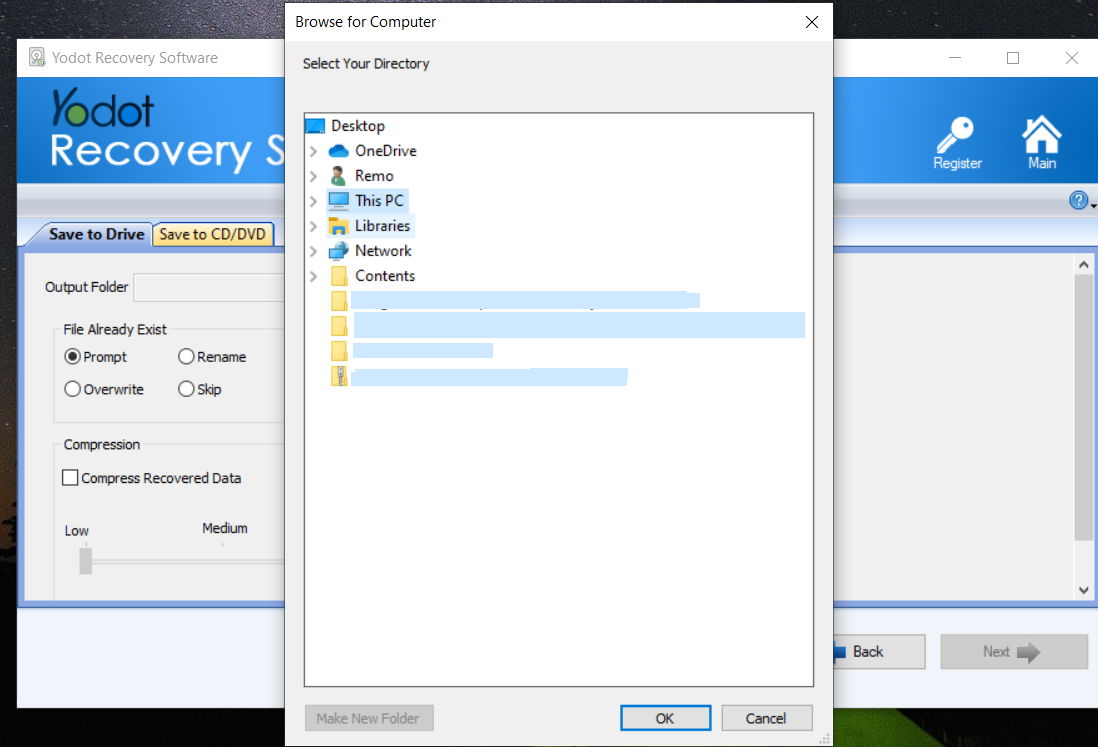
Step 7: Select the data and click on Next to save it in your preferred location by clicking on the three dots next to the Output folder box.
There are other ways that can be used to restore the files lost from Windows computers, given that you have enabled these features early.
Method 2: File History
File history has copies of files from which you can recover the lost data.
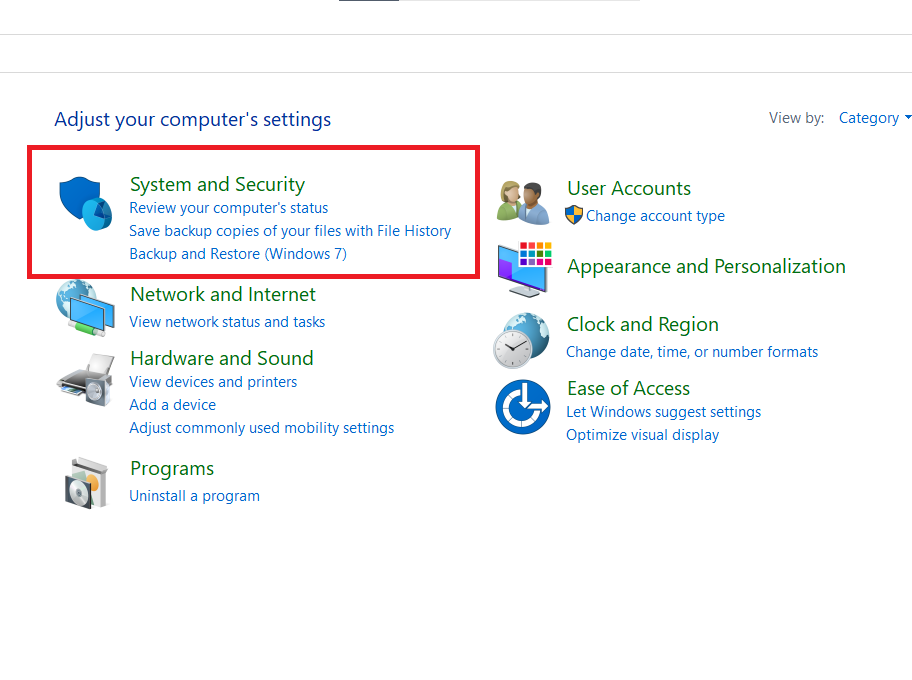
Step 1: Open the Control Panel and click on System and Security.
Step 2: Click on File History and Restore personal files.
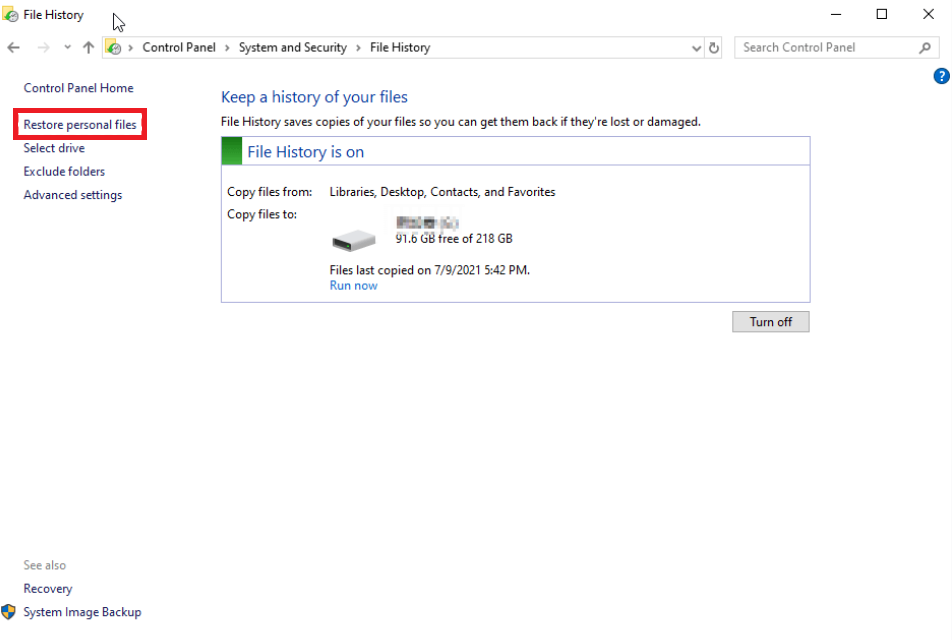
Step 3: Select the file you want to restore and click on the Restore button.

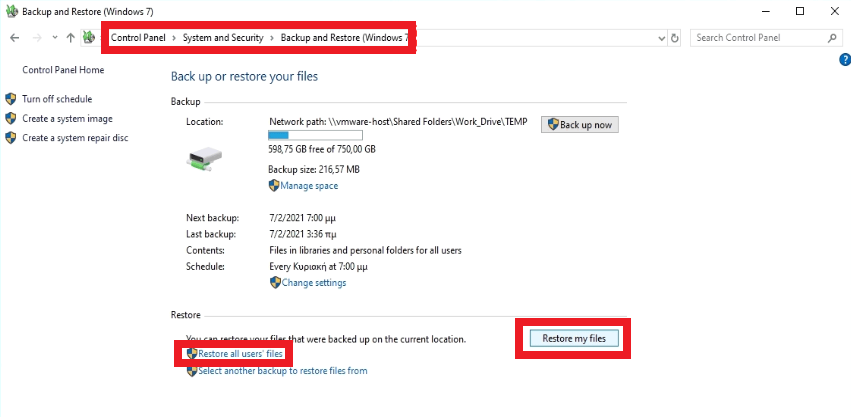
Method 2: Backup and Restore
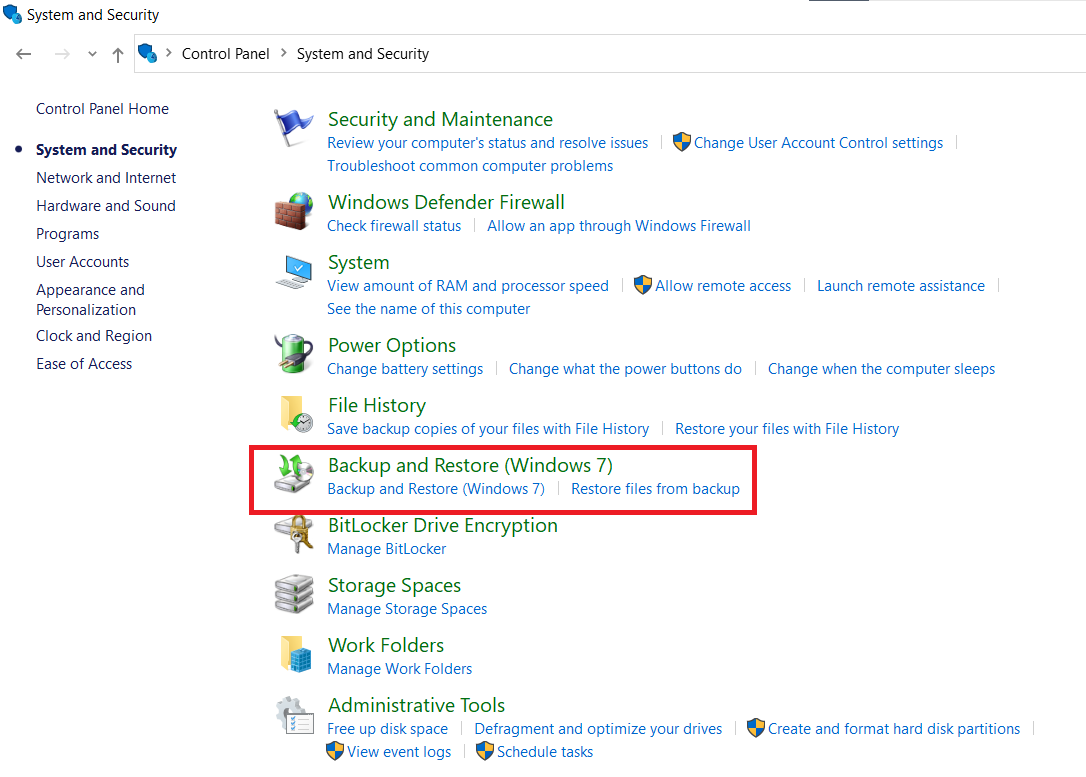
Step 1: Open the Control Panel and navigate through System and Security > Backup and Restore (Windows 7).
Step 2: To restore particular files, click on Restore my files. You can also click on Restore all users’ files to restore all the files.
Step 3: You can browse a location to save the backup; after this, select the files and click on Restore.
Even after trying all of these methods, if you were not able to recover, then the data must have been overwritten by other data, CHKDSK might have marked most sectors in the hard drive, or the entire hard drive is physically damaged.
In case of physical damage, you need to take your hard drive to a nearby data recovery service to recover data from it.
Finally:
CHKDSK is a very useful utility, but if it misfires, it can cause you more harm than good, like Data loss. This article discusses all the possible ways to recover lost files after running CHKDSK. We hope the methods in this article helped you in getting your valuable data back.