Cleaning is good, but clutter is bad. It is something that we have all been taught as we grew up. However, when it comes to formatting your SSD, which is the ultimate resort for cleaning. Cleanliness becomes a double-edged sword. While you can dispose of all your unnecessary clutter, in some cases, you find yourself deleting essential files and documents by accident. Suppose this has happened to you, and your mind is spiraling as you desperately search the web for answers. In that case, you need not look any further, as, in his article, you will learn how to get your data back and gain several bits of knowledge essential to maintain the security and health of your data.
What does Formatting an SSD Mean?
Long story short, formatting Is the process in which the overwrites your entire SSD with filler data, and then the system is informed to treat all this data as space, ready to be overwritten.
People format their SSD for many reasons,
- To make the SSD compatible with the operating system
- To make it faster
- To clear all the clutter.
- To remove viruses or malware from the SSD
In the end, after formatting, your SSD may as well be brand new if you…
OK, I get it. But is it possible to get my data back???
Now while your old data may be overwritten and go undetected by your system OS, with specialized software, you may still be able to recover most of your data, if not all. Since we may be dealing with sensitive information, the process has some associated risks. We suggest you seek specialized data recovery software, such as Yodot Hard Disk Recovery, as that is dependable and keeps risk to an absolute minimum. You can download Yodot Hard Disk Recovery and have your data back today!
How do I Recover Data from my Formatted SSD?
There are only a few available methods for recovering data from a formatted SD card. However, the available ones require a deep understanding of system command prompts, while they may be easy to execute If instructions are provided. On the other hand, the fallout might be devastating if a mistake is made. So before we get to the complicated solutions, let us start with a simple, safe, quick, and sure-fire method to get your beloved data back. Yodot Hard Disk Recovery has been designed for the masses to safely help recover your SSD data as quickly as you possibly can with minimal risk. You can regain access to your deleted data within the hour if you download Yodot Hard Disk Recovery now!
How Can I Recover Data from a Formatted SSD using Yodot Hard Disk Recovery?

- Download and Install Yodot Hard disk Recovery
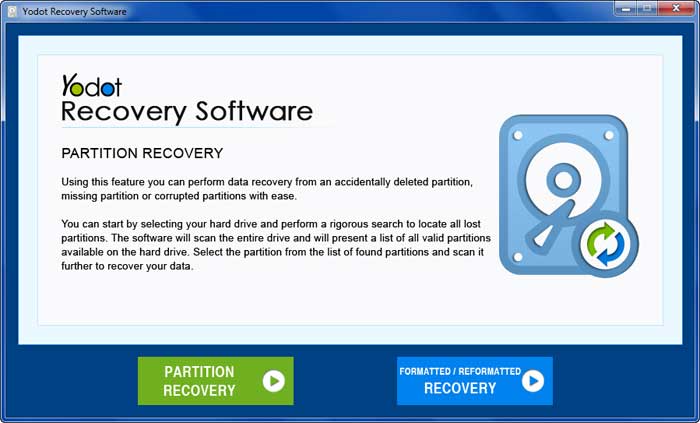
- On the main screen, select the select Partition Recovery option.
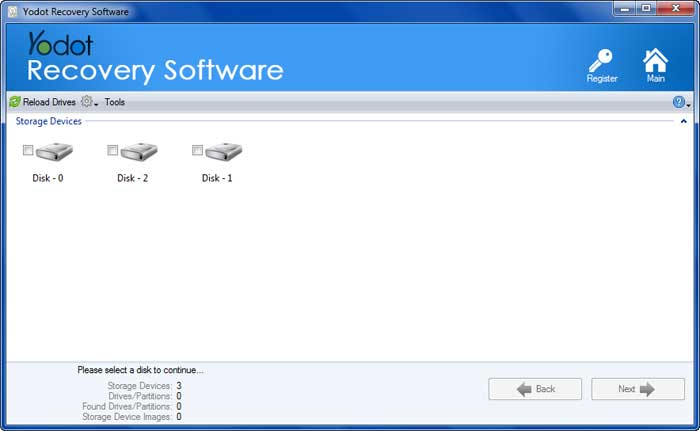
- Select your respective SSD from which data has to be retrieved.
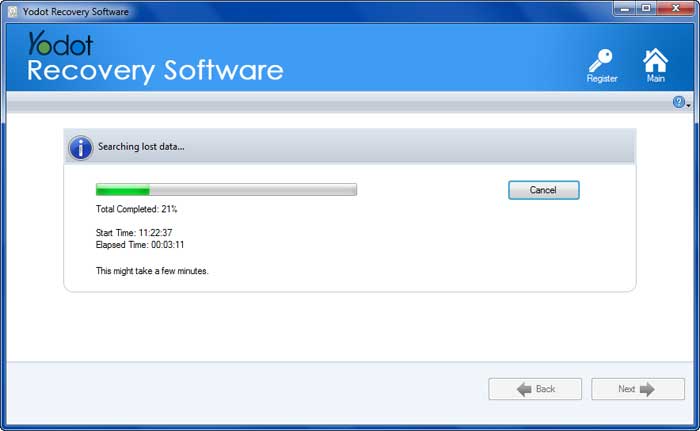
- Now, the software initiates the Scanning Process.
- Once the scanning process is completed, the software displays the data recovered from the SSD.
- You can save the current recovery session to preserve all the already completed scanning.
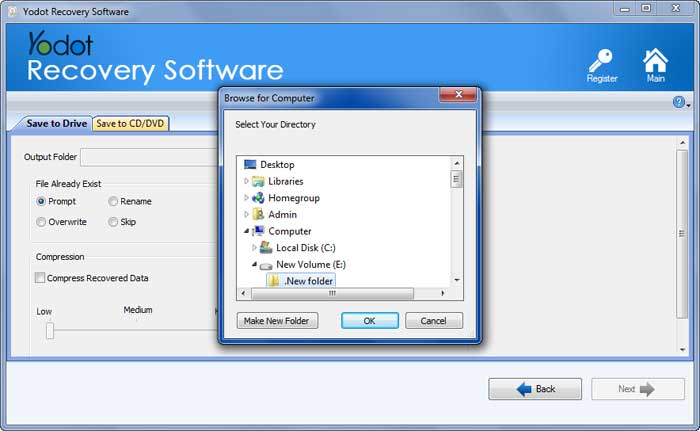
- Select your extraction location from the Save to Drive or the Save to CD/DVD tab according to your preference.
- Click on Next to extract your data to your chosen location.
How to Recover Data from my Formatted SSD for free using Windows File Recovery
- Download Windows File History from the Microsoft store and launch the application
- A prompt will request permission to allow the application to change your device. Click on Yes
- A command prompt will open. Enter “winfr source-drive: destination-drive: [/mode] [/switches]”in the given format.
Let us break down this command to help you understand:
- Winfr- is the name of the command.
- Source-drive: – the location of the drive from where you want to recover the deleted files. E.g., C: or D:
- Destination-drive: the location of the drive where you want to save the recovered deleted files. E.g.- E: or F:
- [/mode] – You must specify a method in the command above. It lets the system know what type of search you wish to execute. There are a few options given below.
- Regular- standard recovery for non-corrupted NTFS drives
- Extensive- a deep recovery mode that supports all types of file systems.
- Default(NTFS)- fast recovery for NTFS utilizing the Master File Table
- Segment- Used to recover NTFS drives utilizing file record segments
- Signature-Recovery mode for file systems utilizing File headers
In this case, the Extensive mode is the most appropriate.
- [/switches]- these are optional conditions that help define the command further. Some of the available options are
- /nopreview- skips preview step
- /forceofflinefix- forces a deep scan and would help recover partially or entirely over written material.
- /nosearch- skip search step
For example:
“winfr C: F: /mode: Extensive /forceofflinefix”
The above command would recover deleted files from the C drive and save them in the F drive using the Extensive recovery mode by performing a deep scan.
4. After typing in your command and hitting enter, you will be prompted to confirm your command execution. Enter Y to begin the search. If you wish to stop the search mid-way, press Ctrl+C.
(WARNING: If not executed properly, this may cause your system irreparable damage. Do not proceed if you are not well-versed with Windows File History)
This process can be tedious and can prove to be very dangerous to your system’s health if you are not sure of what you are doing. For example, suppose you must be better versed with command prompts or computers. Then, it would be best to turn to trusted data recovery software such as Yodot Hard Disk Recovery for assistance. It is designed to be easily used by anyone, making recovering data from your formatted SD card as easy and safe as you can imagine.
How can I Secure my data to protect it in the future?
While you may have been able to get your data back, Let us try our best to ensure you don’t end up in this situation again. Here are a few tips you can keep in mind to secure your data while formatting an SSD.
Back up your data.
While living on the edge may give you that adrenaline rush, it is always better to be safe and maintain a data backup. Today, several cloud backup options automatically back up your data In real time. And if you are concerned about cyber security, an external hard disk or SSD will do just fine.
Ensure that the system is uninterrupted during file transfers.
While transferring big files (especially during data backups). Always ensure that your system is always plugged in, for the sudden loss of power may cause you to lose important data or corrupt your files.
Eject external storage devices properly.
Saving 3 seconds and paying for it with your data is a bad trade deal. Suddenly disconnecting your Pendrive, external SSD, or any external storage from your system could corrupt your data or result in data loss.
Formatting data is a fantastic method that people may use to breathe new life into an SSD. However, in case essential data gets deleted by accident, we know the steps we can take to recover it. In Addition, we have also learned how to prevent such scenarios from happening through data back-ups and ensuring that formatting processes and file transfers happen uninterruptedly. We sincerely hope that this article has been of help, and we hope that you recovered all your files safely.
FAQ:
Does formatting an SSD erase all the data?
Yes, formatting an SSD is like a factory reset and brings the SSD to its original state as if it were new. However, you may be able to recover your data with the help of specialized data recovery software.
How long would it take to recover my data?
With Yodot Hardisk Recovery, you can recover your data within 15 or so, depending on the speed of your system and the amount of data to be recovered. Yodot Hardisk Recovery has advanced scanning technology, which scans the entire hard drive block by block to recover all your lost or deleted files and folders.